Forend Disassembly

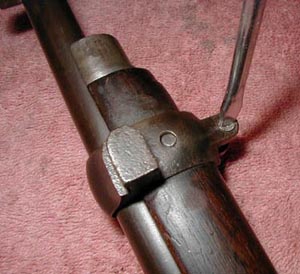
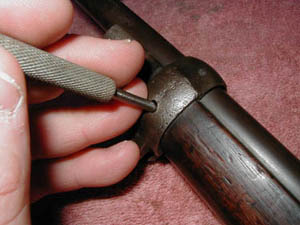
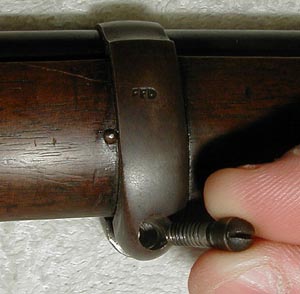
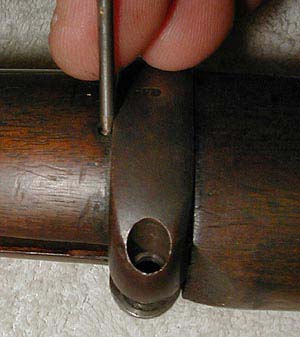
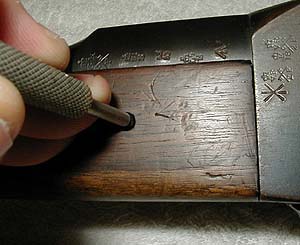
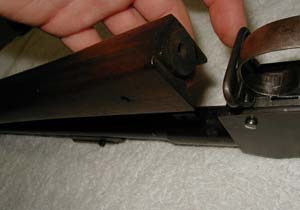
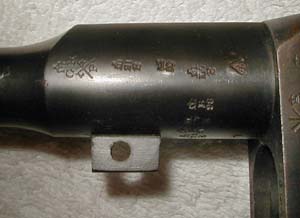
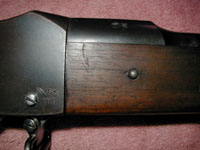
Forend removal will allow for cleaning of an often neglected portion of the weapon, and will allow you to view many hidden proofs, stamps and markings (most important of these, the weapon's serial number). There are two variations in attaching the rear portion of the forend to Military Martinis. Both methods utilize barrel bands which are held in place by pins and screws (one barrel band on some carbines). On Mark I and II Infantry Rifles, and the Artillery Carbine Mark II, a pin is driven through the rear portion of the forend wood. This pin passes through a block of metal attached to the bottom of the barrel which keeps the forend and barrel securely attached to one another. Since metal is a good conductor of heat, it was found that heat from prolonged firing would transfer from the barrel, through this block and into the pin. Some complained that touching the ends of the pin, which protruded from the sides of the forend, would cause burns. In fact, many soldiers would wrap rags, dampened cowhide, or leather around this area of the rifle to prevent this. This problem was addressed temporarily in some units by issuing a leather cover which was wrapped around the rear forend, and held in place by leather laces. Eventually, the problem was permanently solved by dropping the pin and block method in favor of a hooked plate arrangement. This improved method utilized a small, hooked metal plate mounted at the rear bottom of the forend. This plate was attached to the underside of the forend by two wood screws. The hooked end would lock into a channel milled out of the front of the action body to secure the rear of the forend to the rifle. This method eliminated the heat transfer problem, and was used in the Mark III Infantry Rifle and later, and all Carbines except the Artillery Carbine Mark II (which was essentially a shortened Mark II Infantry Rifle).

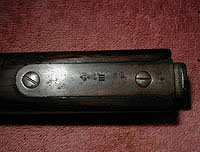
Pin And Block Type Forends (Mark I and II Rifle, Mark II Carbine)

Hook and Plate Type Forends (Mark III and later Rifle and most Carbines)

Start by making note of the orientation of the barrel bands to ensure you put them back the same way. If you forget, the screw heads and the bayonet lug are typically on the right side of the rifle (i.e. the same side as the cocking indicator). Remove the forward barrel band screw and remove any sling swivels or piling/stacking swivels if present.

Drift out the front barrel band pin with a small punch. Sometimes, the end of the pin has mushroomed from repeated impacts, and will not pass through the barrel band and/or forend wood. If this is the case, simply drift out the pin from the opposite side. With the pin removed, try sliding the barrel band forward. Separating the band ever so slightly may be necessary to do this, but take caution not to bend the band too much. Slide the band forward, over the front sight post and off the rifle.

Unscrew the lower barrel band screw. This requires a proper fitting screwdriver. If you don't have one, STOP and go buy one. Don't bugger up the screw head with an ill fitting screwdriver. The money spent on the right tool will be well worth the time it took to run to the hardware store to fetch one. Enough preaching about that...

To remove the lower barrel band, I drift out the tiny pin just forward of the band (if one is present on your weapon) and carefully slide the band forward and off of the weapon. Some folks like to leave the pin in. To get the band off, they loosen or remove the screw and spread the band open with a screwdriver. I prefer and highly recommend simply removing the pin. Primarily becuase you don't have to stress your barrel band by spreading it so much, but also because it allows you to better clean the gunk which may have accumulated around the pin. Another benefit to drifting the pin out is that the pin itself should also be cleaned and lubricated with a light coat of oil to prevent it from corroding. This is just my preference...do it whichever way you find easiest.

With both barrel bands removed, drift out the forend retaining pin, located just forward of the action body.

Gently separate the forend from the weapon. Clean. Inspect. Catalog any markings on wood and metal you encounter while you have the weapon apart. Reassemble in reverse order when finished.

Here's a shot of the forend pin block attached to the underside of the Knoxform. You can clearly see how the metal to metal contact of the pin would conduct heat from the barrel. Note the inspector stamps on the underside of the Knoxform.

Martini Home | The Boxer-Henry Cartridge | Carbines | Infantry Rifles | Zulu Wars | Links | Bayonets | Markings

Questions, comments, something to contribute? Contact me, Jason Atkin, at the address below...

jmatkin@martinihenry.com
Last Modified: 12/12/03