|
|||
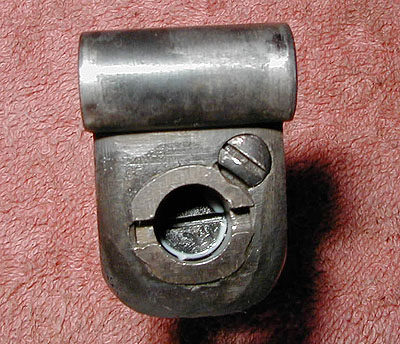 |
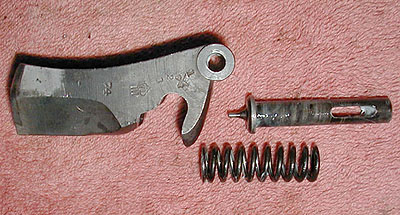
Lets have a look at the rear portion of the breechblock. Near the center of the breechblock, you'll notice the slotted stop nut (the piece that keeps the striker spring in the block) and the slotted end of the striker itself. In the upper right portion of the block, notice the stop nut keeper screw (commonly buggered up, but not on this particular example). The slot in the end of the striker is there to facilitate rotating the striker to the correct position for reassembly. The first step in disassembly is to rotate the stop nut keeper screw so the half-moon cut is aligned as shown in the picture. This allows the stop nut to be unscrewed. Complete removal isn't necessary, but it's a good idea to clean beneath the keeper screw. |
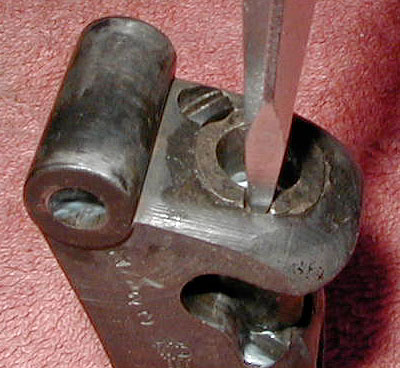 |
Step two is to gently unscrew the stop nut with a large flathead/regular screwdriver. Often, the threads are dirty, so some cleanup work with mineral spirits or penetrating oil and a stiff brush will make removal easier. This step is also important, because you don't want to run dirt purposefully through the threads. Use a snug fitting screwdriver, as it is very easy to bugger up the slot with an ill fitting tool. You may notice the white goo at various places on this breechblock. This is Tetra Grease, a fantastic firearm lubricant available from most firearm retailers. A suitable lubricant (not oil) should be applied to every metal to metal friction point within the action body. |
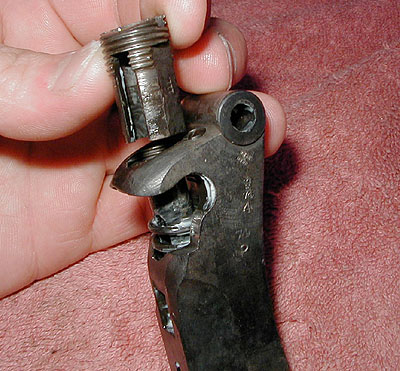 |
Once unscrewed, lift the stop nut out from the breechblock. |
 |
Tip the end of the breechblock downward enough for the striker to slide out the back of the block. You might need to tap it gently into the palm of your hand, depending on how much gunk is in the striker shaft. Once it protrudes from the rear of the block, gently pull it from the block. Notice the striker spring will come out with the striker. |
 |
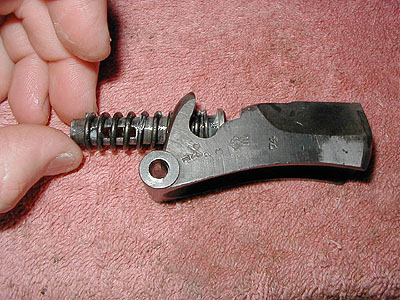
Your breechblock is now stripped and ready for cleaning. I clean each piece with a stiff brush and mineral spirits, then gun solvent. For stubborn grease and goo, I've had success with gasoline. Considering the volatile nature of these chemicals, be sure you're in a well ventilated area, and nowhere near sparks or open flame while using them. A little common sense goes a long way. |
 |
|
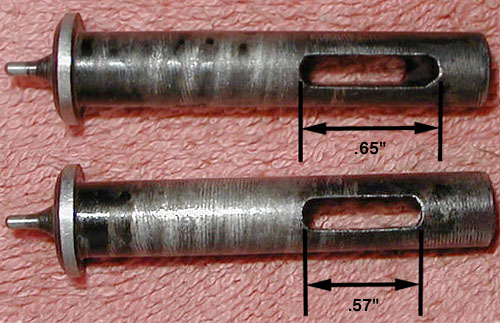
Reassembly Note: The slot at the end of the striker is beveled, and must be installed properly. The wider end of the slot must face downwards when the striker is put back into the block. The consequence for putting the striker in upside down is that the striker will not sufficiently contact the cartridge primers, resulting in no loud bang. |
![]()
Martini Home | The .450/.577 | Carbines | Infantry Rifles | Zulu Wars | Links | Bayonets | Markings
Questions, comments, something to contribute? Contact me, Jason Atkin, at the address below...
jmatkin@martinihenry.com
Last Modified: 12/12/03